


 405
405 7
7 1
1 5
5 1
1 0
0


A simple, small Burlap Drawstring Bag easy enough to make in multiples and stylish enough to use. The bag is topped with a decorative binding, lined with matching fabric, and includes a ribbon drawstring.
This tutorial is designed for beginner sewers or advanced with simple step-by-step instructions.

Do you like cute little bags? and burlap? I love them both and had so much fun making this. because it’s easy and quick and burlap, hello!! I practically bought the whole bolt. so I will be in a serious relationship with my sewing machine for awhile. I lined it with a solid red because brown and red just look good together. and it matches my bedroom furniture.
I know you all want to make one too, so here’s how!
What you will need:
Instructions for How To Cut Burlap
1 Piece of burlap
Matching fabric for the lining
Matching binding
Matching ribbon and thread
To start, cut one piece of burlap and one piece of matching lining 14 x 10.
Sew your lining to the burlap. Sew up both sides and the bottom. Leave the top open.
Cut your binding 2-1/2 inches in width. Since the bag is 14 inches long you will need to add one inch to each end of the binding. So your binding will be 16 inches long and 2-1/2 inches in width.
Fold in both edges of the binding 1/2 inch, then iron. Line up the binding to the raw edge as shown.
Fold over and pin in place.
Sew in place. So close to the edge of the binding, because later we are going to run a ribbon underneath the binding.
Now fold your bag together with right sides together.
Sew up the bottom and side.
STOP sewing when you reach the binding as shown below. You won’t sew over the binding since you will be running your ribbon through the opening.
Now turn it right side out.
Thread the end of your ribbon with a safety pin.
Run it through the binding until it comes out at the other end.
Congratulations! You did it!
Want more? Try this Easy Cosmetic Bag Tutorial
Keep your Pins organized with this DIY Magnetic Pin Holder

Follow SewLicious Home Decor’s board SEWlicious Sew’en Stuff on Pinterest.

Related Posts
- Valentine Tin Cans with Burlap
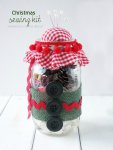 DIY Christmas Sewing Kit
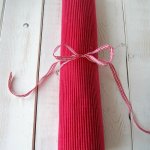 Placemat with Plastic Baggies Sewn Into A Roll up Organizer
- Recycled Food Safe Oreo Cookie Bag to Zipper Bag
- Easy Mason Jar Drawstring Bag Tutorial
- Easy DIY Decorated Christmas Bags
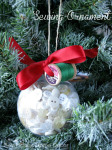 Christmas In The Sewing Room Sewing Ornament
- Summer Sandal Zipper Pouch Tutorial
40571510 


Burlap drawstring bag is my favorite. jute is my also favorite. your blog is very nice i love your every collection. thanks for sharing.
Thank you! Burlap is my fave too!
Cute bag - love the idea of lining it with fabric. Thanks for sharing - pinning.
Thank you and thank you for the Pin! You rock!:)
I love that it’s all lined so beautifully with the seams al enclosed - and it’s not even difficult! (now that you show me how of course) I love the red with the burlap, our living room is cream with red & brown, I love it as a colour combination. Thanks so much for sharing with us.
Thank you, Julie! I’m so happy you like it. It really is super easy to make…I hope you give it a try!