


 398
398 6
6 2
2 0
0 1
1 0
0


Roll-up Organizers are perfect to have on hand! They serve many uses to keep yourself organized, then just toss them in your purse or suitcase! I am so excited to share with you my larger Roll-up version using large plastic baggies. It’s perfect for carrying things like papers, magazines, kids coloring books and crayons or other kids items for road trips as well as many other things. You can also use it to carry in a diaper bag and store extra sets of baby clothes and diapers. Then just roll it up and toss it in the diaper bag!
My daughter is expecting her first baby and I thought it would be perfect for holding extra baby supplies, clothes, and diapers. Just fill each baggie with baby things, roll it up and toss it in the baby bag. That way when she is out with the baby she will always have extra needed baby supplies on hand!
She’s 6 months pregnant with her first boy!
These rollup’s only take 30 minutes or less to make! Here’s how!
SUPPLIES
One fabric placemat (you can get at the Dollar Store)
Large plastic baggies (you can get at the Dollar Store)
Wonder Clips or paper clips
Coordinating ribbon and thread
I used 5 baggies, but you can use however many you need. Line them up at one end of the placemat and secure them in place with Wonder Clips or paper clips.
Place a coordinating ribbon over the end of the baggies and sew them in place. Use a ribbon that is at least 1/2 inches wide. This helps reinforce the baggies and will also keep them from ripping. Sew the ribbon on both sides. Don’t use small stitches, set your machine to use the largest stitch. Small stitches can cause the plastic to tear.
You can also use a basting stitch if that is easier to sew on the plastic baggies.
Sharpen your sewing skills!
On the other end of the placemat find the center by folding it in half. At the center point sew on the your ribbon you will be using to tie the rollup with. Fold the ribbon in half to find it’s center then place the folded end about 1/2 inches onto the placemat and sew in place. This will be the ribbon you use to wrap around the organizer after you roll it up.
Now, just think of all the things you can use this for!
So lovely and useful!
Just roll and go!
P ot Holder Organizer w/small plastic baggies!
This post contains an affiliate link see my Disclosure Policy

Related Posts
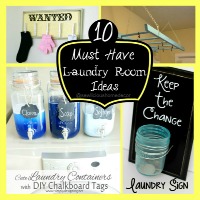
 10 Must Have Laundry Room Organization Ideas
 Turn a kleenex box into a plastic bag dispenser
- Holiday Utensil Holder Napkin Tutorial
- Holiday Flame Napkin Tutorial
- How To Make Funfetti Candy Coated Martini Glasses Party Decorations
- DIY Tissue Paper Tassels Banner Party Decorations
 DIY Christmas Sewing Kit
- Holiday Basket Napkin Tutorial
39862010 


#1 Love the picture of your daughter and grandbaby on the way! She is too cute!
#2 I so need this organizer! I am a baggie junkie and use them for everything!
{big hugs}
~ Ashley
Thank you, Ashley! I am constantly using plastic baggies, too…..for everything!! I thought this organizer would be a great way to use them for when I’m on the go!