This Sandal Zipper Pouch is fun and will be perfect for Summer! Make one for yourself and one for your friends. This step-by-step tutorial is quick and easy.
It’s designed for beginners to advanced sewers. If you can sew, you can do this!
I am so excited to share this tutorial. It’s one I made myself. When I was at the mall looking at all the Summer sandals, the idea came to me to sew one. I traced the bottom of a sandal for my pattern. It’s easy and quick and lot’s of fun to make!
Pick out some fun fabric and you’re ready to begin!
Pre-wash your fabric!
What you will need:
Fabric
Contrasting fabric
7″ Zipper
Yarn
Print the sandal pattern then pin it to your fabric. Cut 4 pieces total. One for the front, one for the back and two for the lining. I stack my fabric then pin the pattern to all the layers so I only have to cut once.
Now let’s match your fabric up. Were going to assemble the front pieces and the back pieces.
Put the fabric your going to use for the FRONT on top with right side showing, then place the piece you want to use for it’s lining underneath it. WRONG sides together. Make sure the WRONG sides are together and both right sides are showing.
I will refer to these pieces as the ‘the front’.
For the back of the two left over pieces…one is going to be the back and one is the backs lining. Lay the lining piece down with the WRONG side facing up and lay the back piece on top WRONG sides together. The RIGHT side will be facing up.
I will refer to these pieces as ‘the back’.
You will work with these as if they were one piece. Keep them together all through the tutorial.
It’s down hill from here! The most important part is making sure you have the fabrics matched up correctly. So double check the steps above just to be sure.
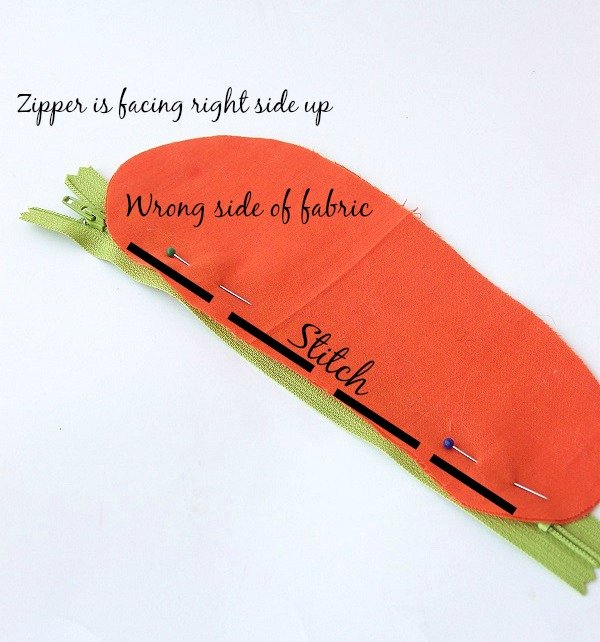
Now, take your FRONT piece(s) and place it FACE DOWN on one side of the zipper exactly as shown below. Zipper is facing right side up.
Sew in place.
Finished look with right side facing up.
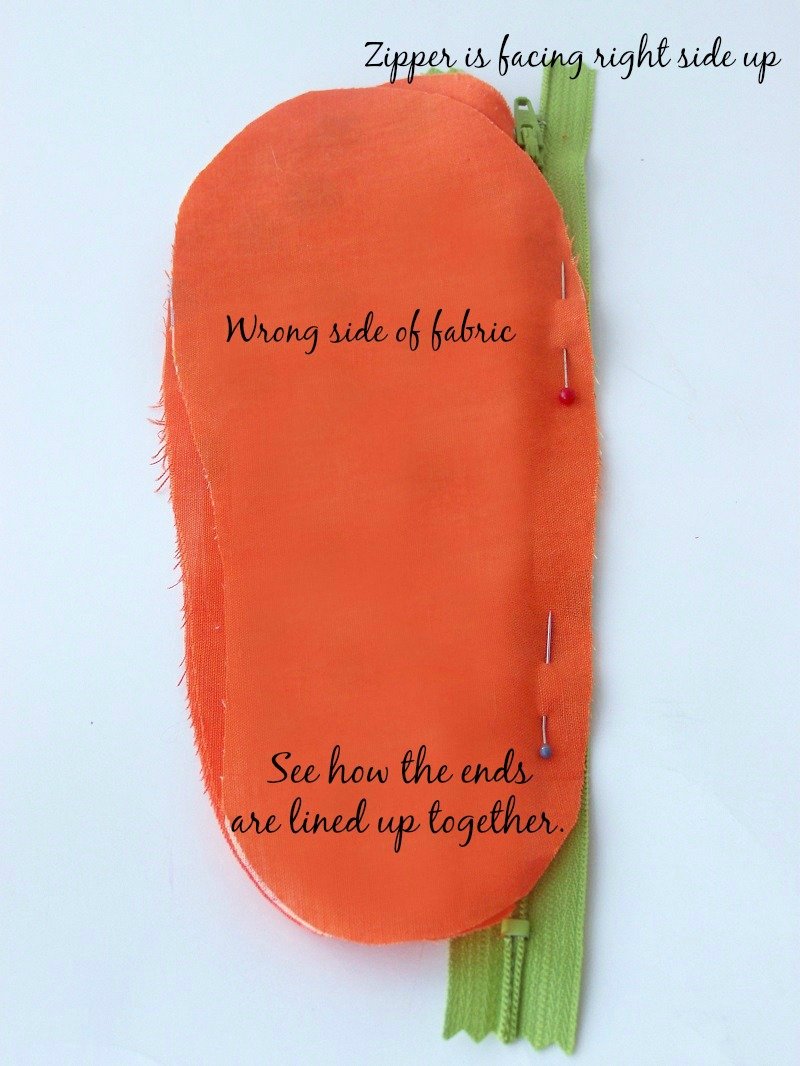
Now take your back pieces, WRONG side facing UP and place it on the other side of the zipper as shown below.
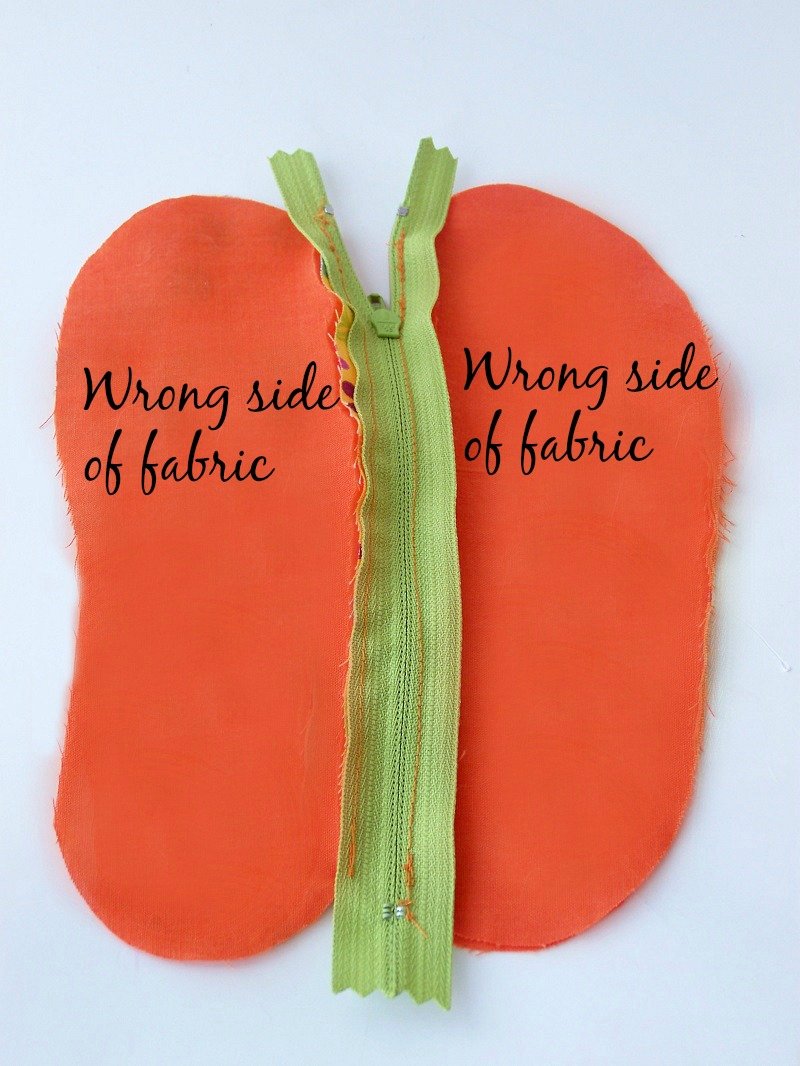
Sew in place. Make sure it lines up with the other side, so that when you turn them to sew them together, they line up evenly together.
It should look like this when you are finished.
Now, unzip the zipper about half way and bring the RIGHT sides together.
Sew up the sides and edges.
Fold the zipper then sew right over it as shown below.
See how the zipper is open…that’s so you can turn it right side out afterwards.
Cut off the access zipper then turn right side out. For the pom pom on top see my Pom Pom Wreath for the tutorial.
Congratulations! You did it! 🙂
For this project I used my Scissor Stand
and my Magnetic Pin Holder
Want another tutorial?
Try my Mason Jar Drawstring Bag
Follow SewLicious Home Decor’s board SEWlicious Sew’en Stuff on Pinterest.


Pingback: Friday Freebies-All You Daily Free Samples
Pingback: Photography 101-How To Make A Light Box