DIY Decoupage Dollar Store Pumpkin
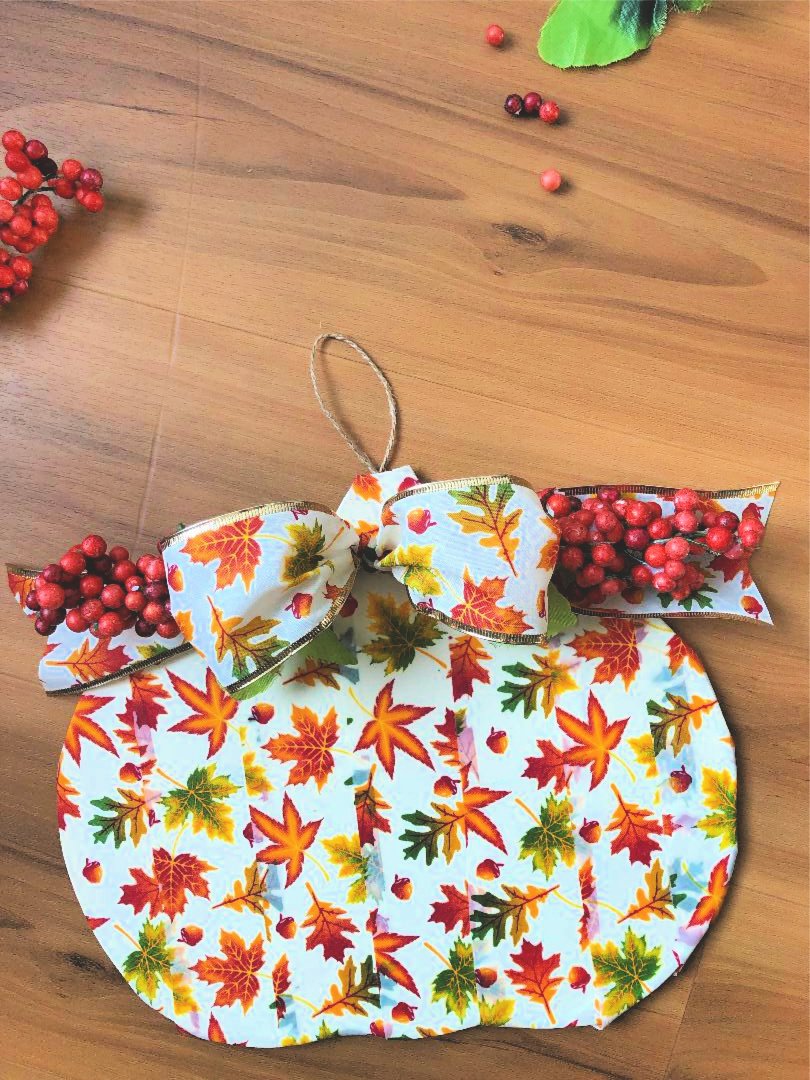
A decorative Dollar Store pumpkin decoupaged with Dollar Store ribbon.
It’s Fall! And I have a Dollar Store craft to share with you!
For this decoupaged pumpkin, I used a plain wooden Dollar Store pumpkin and covered it with Fall ribbon.
You will cut the ribbon is strips the size of the pumpkin and brush glue onto each ribbon.

Step 1. Give the kitty something to play with.
SUPPLIES
1 Wooden pumpkin
1 Roll of ribbon
1 Paint brush
1 Bottle of glue
1 Fall floral pic
Hot glue gun
Starting with the left (or right) side of the pumpkin, measure the size of ribbon you will need. Cut the ribbon to side and glue onto the pumpkin. Making sure you leave about 1/4″ to fold over the edge. Since the ribbon is thin it will take a lot of glue to hold it in place on the back side, so have a hot glue gun on stand-by.
After you place the ribbon on the pumpkin, go over it with glue and a paint brush.
Be sure your ribbon layers are straight.
Cut part of the ribbon so it will fit around the top of the pumpkin. I cut off the string that was attached, and hot glued it to the back when I was finished.